 |
|
 |
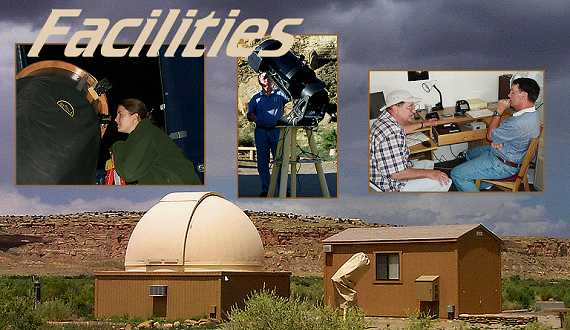
| PUBLIC OUTREACH: The Chaco Observatory has a number of components which can be seen in this photograph. To the left is the dome for the 25-inch, F/4 Obsession Equatorial Dobsonian. In the foreground is a Celestron 14-inch Schmidt-Cassegrain equipped with an SBIG-7 CCD camera. The imaging room is to the right. The room is used for public digital slide presentations using only photos that have been generated at Chaco. To the far right is the amphitheater which is used for large group presentations about astronomy and archaeoastronomy. |
 |
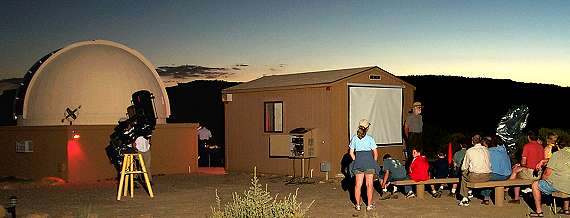
| STAR PARTIES: After sunset on clear nights, the parking lot area in back of the Visitor Center often turns into an impromptu star party. Visitors who bring astronomical telescopes into the Park are encouraged to set up their equipment here for everyone to enjoy. All lights at the Visitor Center can be turned off to facilitate a truly dark sky experience. |
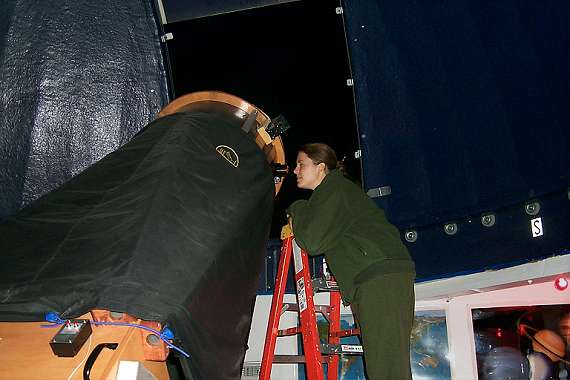 |
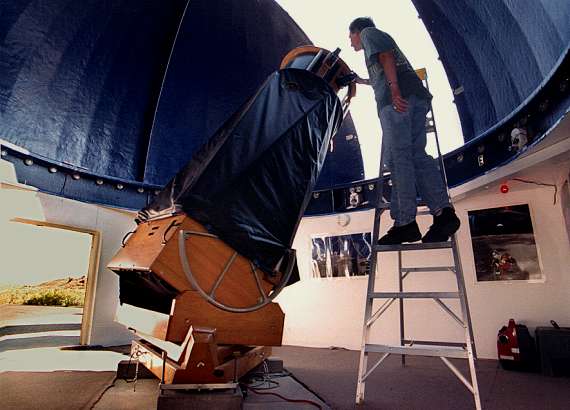
| ASTRONOMY IS AN OBSESSION: The largest telescope at Chaco Observatory is a 25-inch, F/4, Obsession reflector on an equatorially driven Dobsonian mount. The telescope has digital encoders to help with the location of celestial bodies. In this photo, Angie Richman takes a peek at the dark Chaco skies. |
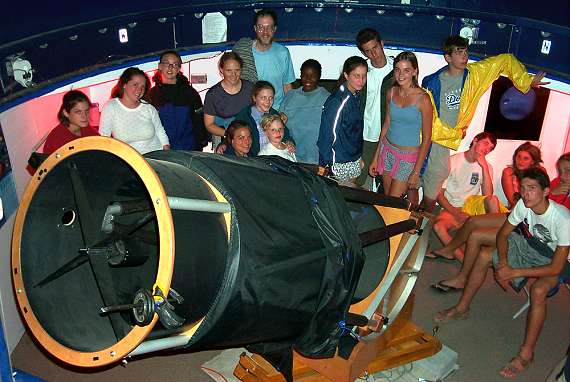 |
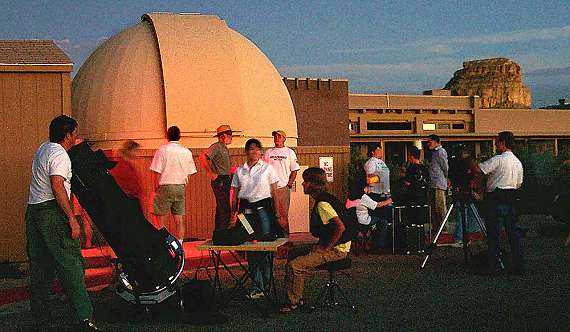
| DEEP-SKY OBSERVING: The 25-inch Obsession is a focal point for evening presentations. After the main archaeoastronomy talk in the amphitheater, audiences are eager to observe the heavens through Chaco's telescopes. One group usually uses the 25-inch, while another is treated to images taken at the Chaco Observatory. Other groups join volunteers for an upclose and personal tour of the universe which sometimes lasts into the early hours of the morning. |
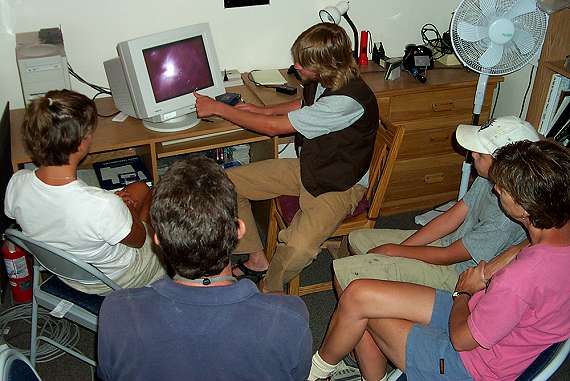 |
| IMAGE SHOW: Former astronomy SCA (Student Conservation Association) volunteer, Derek Dillman, better known as "Teflon Jimmy," gives Chaco visitors a slick presentation about astronomy using CCD images that have been taken using the Observatory's equipment. |
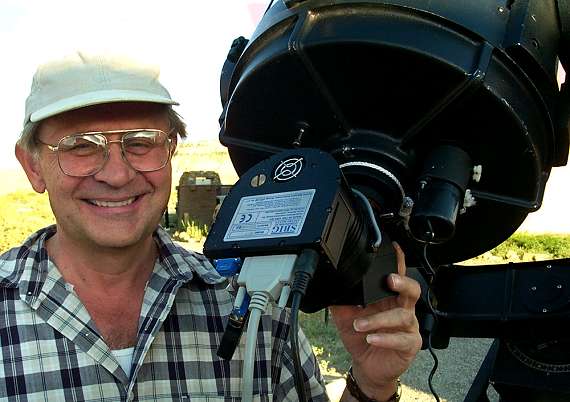 |
| CHARGED COUPLE DEVICE CAMERA: The heart of the electronic CCD imaging system at Chaco is an SBIG-7 camera with an adaptive optics package attached to the unit. John Sefick, founder of the Chaco Observatory, stands in back of the Celestron 14-inch catadioptric system that has been used for most of the imaging at Chaco. |
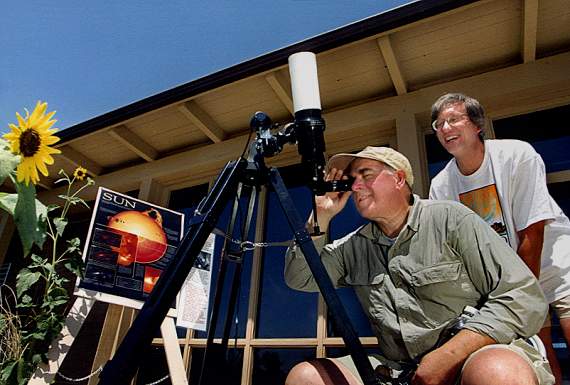 |
| SOLAR WATCH: The tradition of sunwatching begun by the Chacoans thousands of years ago continues in the Park today. A Helios sun telescope allows visitors to safely view the sun in red hydrogen light. This sun scope allows observers to not only see sunspots with ease, but also to view prominences, flares, and filaments, something that could never be accomplished with an ordinary telescope and filtration system. Fran Kittek photo... |
 |
| CHACO'S ASTRONOMY COMPLEX: Seen from Una Vida, the Chaco Observatory has superb views of the sky from one of North America's darkest observing sites. Come join us for a memorable evening. |
 |
| 1. Unlock and open door. Turn on red light on dimmer switch. |
 |
| 2. Flip the switch on the power strip above the red light to the on position. 3. Turn on the power panel which controls the dome and the shutter. |
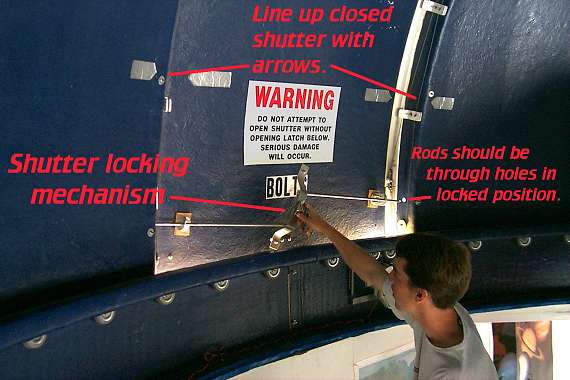 |
| 4. Remove the keys from the power panel, and unlock the dome shutter guard. Then lock down the shutter guard in the unlocked position. |
 |
| 5. Move the dome so that the electrical contacts are engaged. 6. Open the dome shutter. Align the two marks on the moving shutter with the two stationary arrows on the dome. 7. Rotate the dome off the electrical contacts which cause the shutter to operate. |
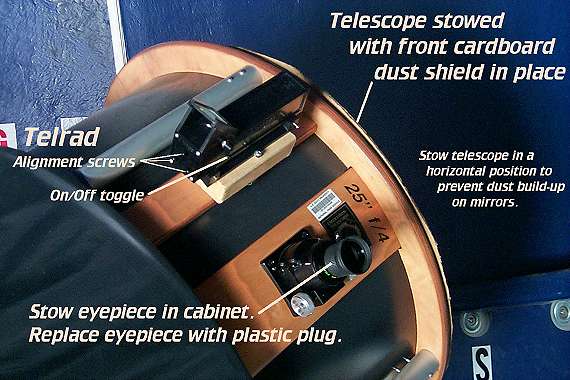 |
| 8. Remove the front end cover (Velcro) from the telescope. 9. Replace the eyepiece cap with the two-inch eyepiece holder and eyepiece. |
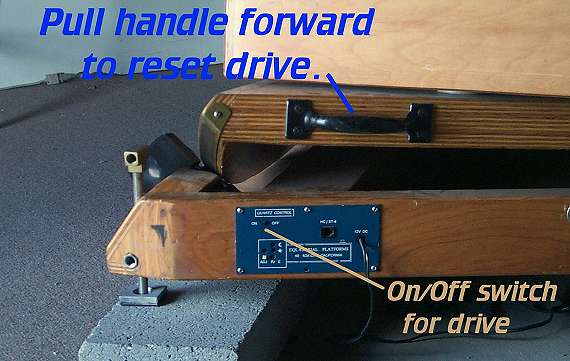 |
| 10. Turn on the telescope drive by flipping the switch located near the base of the instrument. Now you’re ready to observe. |
![]()